Accounting Recurring Items
RECURRING ITEMS SETUP / MAINT / POST
PURPOSE:
This option is to set up GL Journal entries in a file that can be transferred, regularly, to the main detail Journal file. This option is a time saver. By recording transactions that are done on a regular basis you can create the same information without re-entering journal records repeatedly. Journal entry's that occur on a regular basis such as once a month and have a set amount or percentage can be entered into this option.
REQUIREMENTS:
The following files need to be setup before you entering data records:
- A Valid COMPANY Master
- A Valid GL Chart Of Accounts
- Valid Customer/Supplier Master File
Entering data records into this option alone will not produce the necessary journal detail records. To post records use Tools - POST RECURRING ITEMS.
A good understanding of accounting, particularly debiting and crediting is required to enter the information correctly. Since records are posted as is, one line per account number both debit and credit entries must be created. A credit entry is indicated by a negative number (-500) and a debit is is indicated by a positive number(500).
ADDING NEW RECORDS
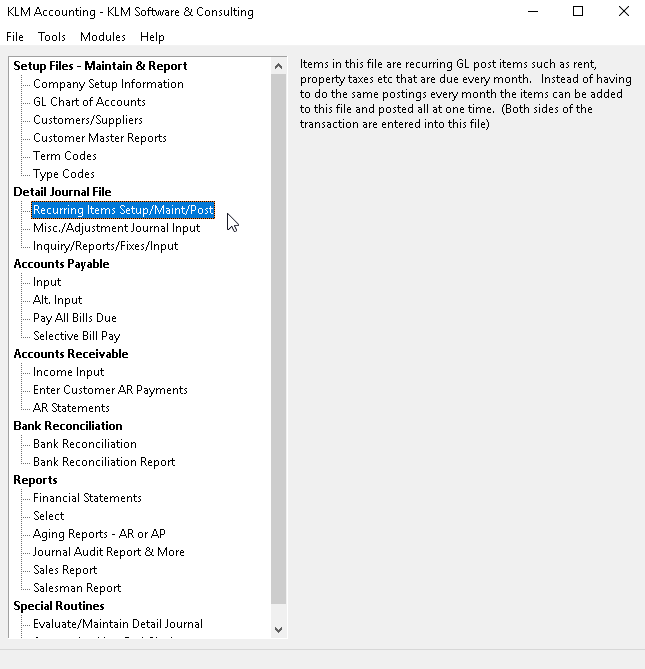
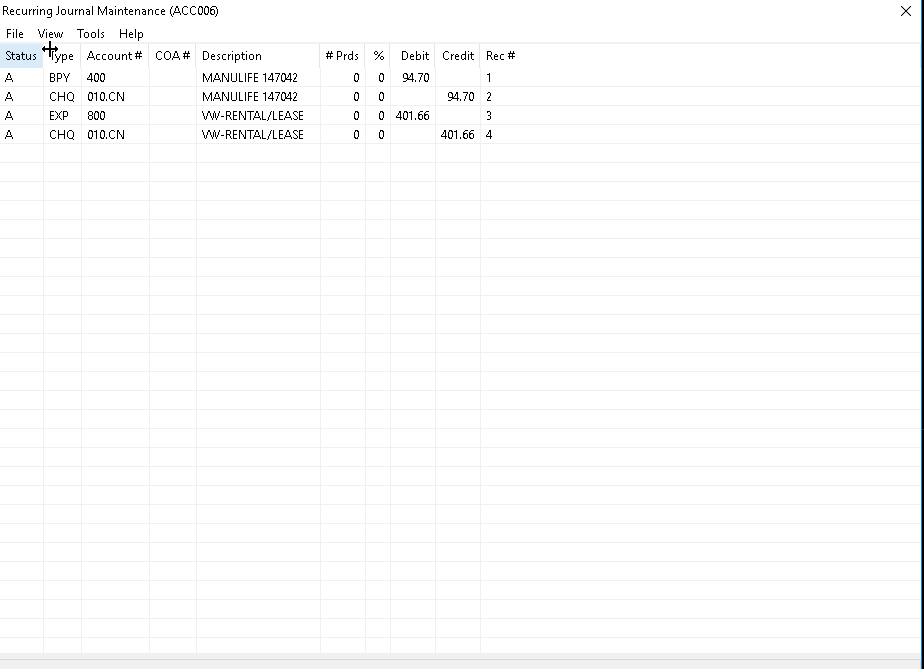
1) Select the Recurring Items options. The first screen will be a list of ALL existing Recurring Item records. If this is the first time you are entering this option, the first screen will be blank.
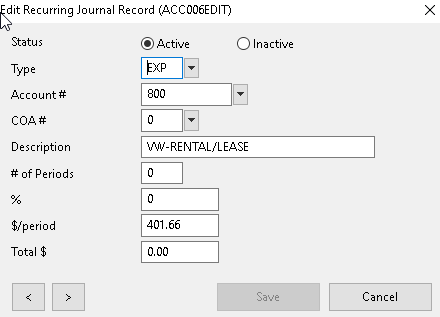
2) At the VIEW select records screen, click on FILE, then select NEW. A blank EDIT screen will appear.
3) Enter your data. To save the new record, click on the SAVE button. You are returned to the prior screen.
MODIFY OR DELETE EXISTING RECORDS
1) Select the Recurring Items option. The first screen will be a list of ALL existing Recurring Item records.
2) To EDIT an existing RECURRING ITEM record, select it by double clicking on the record in question, while in the VIEW records screen. The program will display an EDIT window.
3) If you wish to DELETE any existing Recurring Item record, then change the STATUS field from Active to Inactive.
4) Enter changes. To save the record, click on the SAVE button.
POST RECURRING JOURNAL TO GL JOURNAL
PURPOSE:
The sole purpose of this option is to transfer the journal entries entries stored in the Recurring file. Each time you wish to post entries from the Recurring Transaction file to the Main GL Journal file run this option. This option is most often used at the beginning or end of an Accounting Period for items such as rent payments and depreciation.
REQUIREMENTS:
This option can be run as many times as you wish but keep in mind that ALL entries in the Recurring File will be transferred. The Journal entries to be posted must already have been created before running this option. Remember, all entries are transferred as is, no off-sets are created. The program does not verify either Customer/Supplier or GL Account Numbers.
The following files have to exist:
- A valid COMPANY MASTER File
- Valid DETAIL JOURNAL File
When entering this option, you will be provided with defaults for the accounting period, transaction and due dates. All defaults can be overridden and are provided only as a guideline.
If you have a large number of entries to post, you may wish a hard copy (printout) of all entries for your own records and as verification that the transfer was successful.
Option #30-Evaluate/Maintain Detail Journal MUST be run before any of these newly created journal records will affect either your reporting or GL Chart of Accounts
POST RECURRING JOURNAL ENTRIES TO GL JOURNAL
Following the instructions listed below will result in a successful posting of recurring journal records to the main GL Journal file:
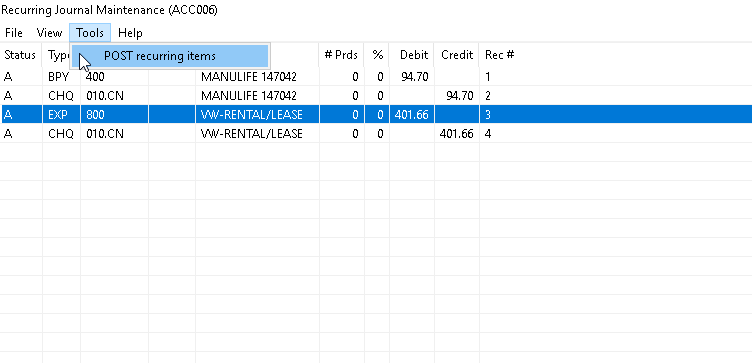
1) At the first screen click on the TOOLS option, then select POST RECURRING ITEMS
2) The prompts below determine the particulars of each journal record that is transferred (i.e. period number). Answer each prompt as follows:
- Post To Period defaults to the current accounting period. This is the period to which each journal record will be applied.
- Today’s Date defaults to the computer's system date. This date will be placed in the Transaction Date of each journal record.
- Due Date defaults to the computer's system date. This date is placed in the DUE DATE of any journal record that is an outstanding AP entry. No other entries will be effected.
3) The prompt Print Report is optional and defaults to YES for a report. Answer NO if you do not wish to print a report.
4) The prompt Test Run, allows you to run the report without actually creating journal records. This is good idea if you have made changes to the journal entries. Verify that you have equal number of debits and credits, as the program does not create off-set entries automatically.
5) When ready to run this option, click on POST to begin the process. The records are posted and a report is printed (if requested). Once done, you are returned to the KLM Accounting Main Menu.
6) Once the options has been run, be sure to verify that the posting worked. Also, be sure to run Options #30 Evaluate / Maintain Detail Journal, in order to update GL Chart Of Accounts
FIELD DEFINITIONS
Field |
Definition |
STATUS |
Is either ACTIVE (A status) or INACTIVE (D status). |
TYPE |
Enter up to three characters for the Transaction Type. Valid Transaction Types are the ones previously set up in the Transaction Type Table (Menu #5). In most cases this field is used as a short description to categorize the journal entry. |
ACCOUNT # |
Enter the applicable GL Account Number (Menu #2). The Account Number MUST be valid. The GL Account is displayed at the top of the screen. |
COA # |
OPTIONAL. You can enter the COA Number or Search Name, of any valid COA file (Menu #3). You do not need to fill in this field unless the entry is associated with either a customer or supplier. Use the SCAN feature to view the COA Master file. |
DESCRIPTION |
OPTIONAL. Eighteen characters are available for any description that may be helpful to identify the purpose of this entry. |
PERIODS |
This field indicates the number of periods the entry is to be posted to the General Ledger. Every time you POST entries, the number in this field is reduced by one. Once zero is reached, the record is automatically deleted. |
%/PERCENTAGE |
This field can be used to apply a percentage of either the $/PERIOD or TOTAL $ field. Enter the percentage as you would say it (i.e. 10% is entered as 10). |
$/PERIOD |
Enter the amount to be posted each period. This field can be combined with other fields to obtain the desired amount. Remember to specify whether the amount is a debit (plus) or credit (minus) amount. |
TOTAL $ |
Amounts entered in this field limits the total amount to be posted before this entry is deleted. The PERC % and $/PERIOD fields indicate the portion of the total amount to be posted each time posting is done. Once the total amount posted equals the amount in this field the entry is automatically deleted. If this field is filled in, the #PERIOD field should be left blank. |