Calculating a Payroll
Payroll Calculation
Purpose
To create and print cheques, based on the batch input file you created in Payroll Input. It is also possible to re-print cheques and/or bank stubs created by a prior run of this program (due to an interruption).
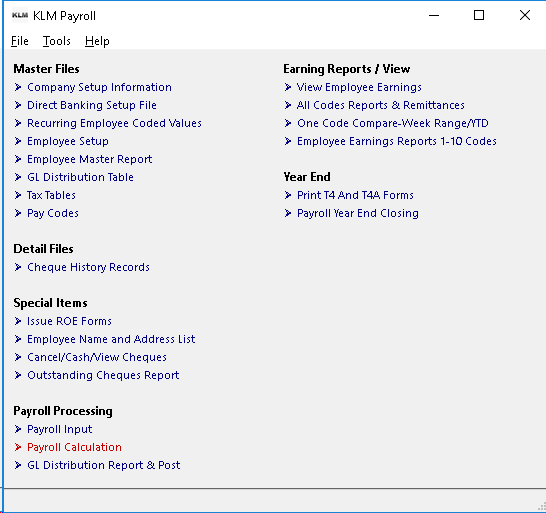
To calculate the payroll choose Payroll Calculation from the menu:
Results of running this option (in order) are;
- A Cheque calculation Report, showing the assigned cheque number and the results according to pay calculations.
- The Cheques calculated and any adjustments are added to the Cheque History file.
- A cheque print file (just for this run) is created, for use in batch printing the Employee's CHEQUES/Bank Stubs. An indicator is set on the Cheques in this file that are to become bank stubs based on the Employee Account number (see Menu #5) and the bank feature being active.
- The processed Cheque INPUT file is deleted, unless the "SAVE CHEQUE INPUT" (defined in the Company Master #1) is set to "Y". This option is not recommended unless you have the same input every week.
- Print CHEQUES according to the file created in 3.
- If Bank feature active, print Bank stubs and create Bank modem file (to be sent to Bank) according to the file creating in 3.
- Delete Cheque print file created in 3.
Steps To Follow
Before
- Verify, the contents of your pay INPUT records for any missed employees or wrongful allocation of hours worked.
- Do a DATA Backup (using the COPY Data option in PAY#20)
After
- Do a print out of the current weeks results using PAY#24 to verify that everything came out correctly.
- Do a DATA Backup as new records have been created. You should have a regular routine of backing up on a weekly or per pay period basis, as new records have been created.

Run Options
Company is used to indicate a different INPUT file and must be the same as the company number used when the INPUT was created.
It is possible to put employee's from several different companies in company "01"'s INPUT file, if there are no unique custom calculations, different cheques required, or different Bank Modem information.
If Cheque Print File Exists
You can ignore this section, unless you need to reprint either the cheques or bank stubs. The default is always 1. for IGNORE. The program assumes this is a NEW run.
New Run Options
TEST RUN Y=YES (NO PROCESSING) or N=NORMAL
If you change this field to "Y", you will get a test sample cheque calculation report but no other RESULTS (no cheque history records are created, nor is a cheque printing done). Keep in mind, if two cheques are calculated for one employee, the second one will not reflect the addition of the first one.
Apply Cheques To Week
All Cheque history records created from this run will be assigned this week number (unless the next option is changed) even if the INPUT week number is different.
If Input Week, Not Equal to Apply Week, Then Set It To Apply Week
If this field is set to "N" the Week assigned to the Cheque history records created by this run will vary based on the INPUT week number.
Starting Cheque Number
Will automatically display the last cheque number used but you can override this information and put a new cheque number in the prompt.
Copy Data Input File Before Processing
The default is Y (for YES). This creates a copy of your current year's data files as of this moment. We recommend you do this, so you have a means of resetting the system should you make a mistake.
Cheque Printing Options
These fields are used in the final step during Cheque/Bank Stub printing.
Cheque Date's only purpose is to print on the CHEQUE. This will allow you to postdate cheques.
Show Labour Details On Stubs
Defaults to Y (if you have the labour distribute option) otherwise this prompt is ignored.
Bank Stubs / Bank Modem Options
These options are only used if you print bank stubs (instead or in addition to actual cheques) and/or use the option of creating a separate data file that can be transmitted to your bank.
The appropriate information MUST be in each Employee Master record PAY#5 and a valid Bank File must exist in PAY#2.
Show Labour Details (on stubs)
The same as showing labour detail records on cheque stubs. It is used ONLY if you have the labour detail option active, otherwise ignore this prompt.
Bank Cheque Due Date (if you create a Modem File)
Is only used when creating the Bank Modem File, otherwise ignore this prompt.
Running The Payroll
Once you have answered the appropriate prompts, you must do the following in order to issue pay cheques.
- Select the RUN PAYROLL Button by clicking on it ONCE. This will start the CHEQUE REGISTER routine. A number of additional prompts may appear. You must select OK for each one before processing will continue.
- Once processing has completed, a standard Windows Print Preview screen will appear. You now have the choice of PRINTING the report being displayed or simply CLOSING the Window. We recommend you "print" this report, as it is a record of what you have just done. If you chose to PRINT, you will be forwarded to a standard Windows PRINT Set Up Window. Select your printer then continue. When done you will be returned to the PAY#20 Payroll Selection screen.
- If the Cheque Register is OK. Proceed with printing of the actual PAY CHEQUES or STUBS by selecting the CHEQUE/STUBS Button and clicking ONCE.
If You Need To Reprint Cheques
As long as the cheque print file has not been deleted during the original or subsequent cheque printings, you can choose to print cheques again starting at any cheque you desire.
To reprint cheques, return to this menu option and select the restart cheque printing option.
- Select 2. Restart Cheque Printing. Select a cheque number to start from if you do NOT want to print the entire cheque file.
- Then click on the CHEQUES/STUBS Button to begin the cheque printing. When done, you will once again be asked if you want to "delete" the cheque file.
If the last cheque file has been deleted by an ignore option, you still have one chance to recall it by typing in the following command at the MENU (before accessing this program):
COPY PAYCHEQS.BAK *.DAT
Common Payroll Processing Problems
Occasionally, you may incur minor problems due to hardware or data errors. Below are the most common problems and their solutions.
Program Interrupts
During Cheque Register:
If this is a test run, no response is needed otherwise do the following.
- Do a Data recovery, by either the option provided in Menu #20 (R. Recover Data Files) OR by what ever method you usually use to back up your data files.
- Re-enter this option and select 1 (New run). This will restart the process all over again.
During Cheque Printing
The program is interrupted during the processing of the Pay{Cheques or Cheque Stubs}due to the printer being taken off-line for any reason.
- Follow the IF YOU NEED TO PRINT CHEQUES SEPARATELY instructions listed earlier in this manual section.
Cheque File Already Exists
This message will appear if:
- A Cheque Register was cancelled "interrupted" and a DATA recovery done, OR
- The Cheque file was[saved after]ALL cheques had been printed, OR
- Cheques have yet to be printed for the current payroll.
If situations 1 or 2 are the cause, select OPTION #1 to Delete cheque file and continue... OR if situation 3 is the cause, proceed with printing of the Pay Cheques.
Pay Week Selected May Be Incorrect
If the WEEK NUMBER in the[Allocate Earnings to Week]field of the pay input records doesn't match the PAY WEEK number entered at the start of the program, the input may have been applied to the wrong week.
No Input Records To Process
If you have already run the pay register OR there really is no input file to be processed. If no input file exists, it could have been accidentally deleted or already processed, in either case, you can not run this report without proper INPUT in place.
Missing Pay Cheque For An Employee
Upon completion of the Cheque run, you have either
- forgotten to pay an employee (no input was entered), OR
- the information entered in the pay input file did not result in a cheque being produced.
If situation 1 exists, a separate run can be done for that employee alone using the normal procedure (remember to indicate the correct week number) OR if situation 2 exists, you MUST verify both the pay input and cheque register. Either of the following will result in a cheque not being printed;
- information in the Adj. Chq# field of the input record, OR
- "rejected record" message printed on the Cheque Register the Cheque Register
Rejected Record On Cheque Register
Any record with a "rejected record" message, has not met the minimum requirements for producing a pay cheque. Check both the pay input and cheque register carefully. Having a NET PAY of zero or in the negative, will produce this error.
- Whatever the error, recover your data files, then make the necessary correction in the pay input file.
- Process the Cheque Register again, check for errors.
OR
- Follow the same procedure for "missing Employees" to reprocess the "rejected" record.
"Errors" in Cheque History Records
Errors in employee data usually occur when you are trying to process a new employee, or deduction for the first time. Always be sure of what went wrong, BEFORE you attempt to fix it.
- If ONE record was effected, you can cancel that record in the Cancel/Cash Cheques (Menu #16) then produce a new pay cheque.
OR
- If MORE THAN ONE record was effected, you can do a DATA recovery, and correct the problems in INPUT.
- Process the Cheque Register again, check for errors.
Government Deductions - Missing or Incorrect on Cheque
With few exceptions, ALL employees are eligible for the standard deductions. Please keep in mind that you, the employer, are responsible for correctly processing payroll. Incorrect payroll remittances even by accident, will result in fines.
Canada/Quebec Pension (Pay Codes C and Q)
No pension is taken if:
- An exemption exists in the Company or Employee File.
- An employee is under 18 years of age.
- An employee has not reached the weekly minimum wage.
- An employee has reached the year-to-date maximum.
- The employee's input record had a ZERO in the Total Weeks Worked field.
Deduction taken is lower/higher if:
- The employee's input record had an invalid week number in the Total Weeks Worked field.
- No all earnings were included in the GROSS wage.
Note: Age restrictions and collecting a Canada/Quebec Pension while working are just two reasons an employee may be exempt.
Unemployment Insurance Deduction/Earnings (Pay Codes U and I)
No deduction is taken if:
- An exemption exists in the Company or Employee File.
- An employee has not reach the weekly minimum for either hours worked or wages earned.
- An employee has reached the year-to-date maximum.
- The employee's input record had a ZERO in the Total Weeks Worked field
Deduction taken is lower/higher if:
- The employee's input record had an invalid number of weeks in the[Total Weeks Worked]field.
- Earnings were not divided between weeks correctly.
No insurable earnings exist if:
- No UIC deduction was taken, therefor the earnings are not considered insurable.
Insurable earnings recorded are lower/higher if:
- Earnings were not divided between weeks correctly.
- Weekly calculations were used because proper bi-weekly indicators did not exist.
NOTE: UIC miscalculations are the most common errors made during processing of payroll. You MUST record all hours and wages for the correct time period.
Income Tax Deduction (Pay Code T)
No deduction is taken if:
- An exemption exists in the Company or Employee File.
- The earnings in question ARE not taxable.
- The employee's input record had a ZERO in the Total Weeks Worked field.
Deduction taken is lower/higher if:
- The TD1 amount in the Company or Employee File is in error.
- The TD3 amount in the Employee File (Line 17) is in error.
- Extra deductions that directly effect the amount of tax taken are part of employee's pay (e.g.: union dues RRSPs, support payments).
- The earnings are subject to lump sum calculations.
- The GROSS wage includes taxable benefits.
- The employee's input record has an invalid number in the Total Weeks Worked field.