Payroll Tools Menu
TOOLS Menu Options
KLM Software provides you with a verity of utilities and optional features such as having each employee assigned to a specific department. You will on occasion need to access this section to either set up certain data files or make corrections to data files in error (i.e. Employee Name sequencing is incorrect).
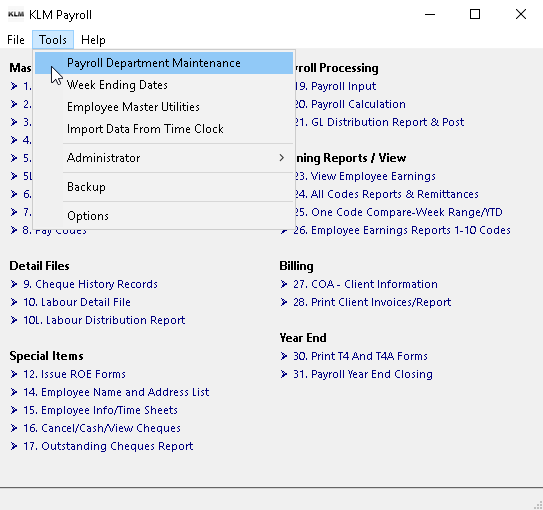
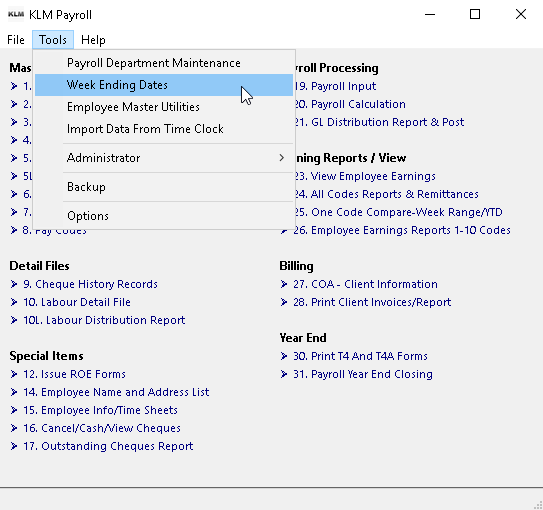
When you access the TOOLS Menu, you have the following:
- Payroll Department Maintenance - To create new or update existing Department Numbers/Names
- Week Ending Dates - To create or update the week ending dates for each company
- Employee Master Utilities - Software utilities provided to fix common data file issues.
- Import Files From Time Clock - Allows importation of data files created using time clock software.
- Administrator - Utility used to set up Users for system. See User Administration Help manual.
- Backup - Allows you to run KLM Payroll's internal backup procedure.
- Options - To make changes to the KLM System's Control record. Only administrators can access this file. Contact KLM Software for details.
Payroll DEPARTMENT Maintenance
This is an option section. This gives you the option of setting a Master file of Department Numbers and corresponding Descriptions (or Names). If you choose to use this option, you can then assign employees to specific departments and print reports limited by department or in department order.
You can have up to 99 departments per payroll company. While it does not matter if departments are entered in "order" it will make it easier for you to view and or change departments if they are listed in ascending order (i.e. 50 - 70 - 100 ... ).
You must have a valid number in order run reports by department. Errors will occur if you change a number already in use.
To access the KLM Payroll Departments feature, do the following:
1) From the Payroll MAIN Menu, click on the TOOLS Menu, then select the Payroll Departments
2) The DEPARTMENTS Screen will appear. If this is the first time you have accessed the program, the screen will be blank. If a Department file exists, it will be displayed. The program will always default to the Department file for Company 01. You can change this.
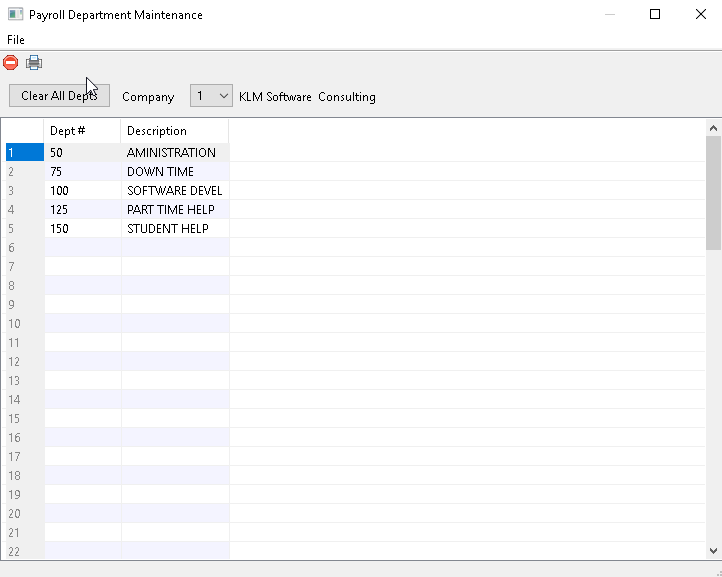
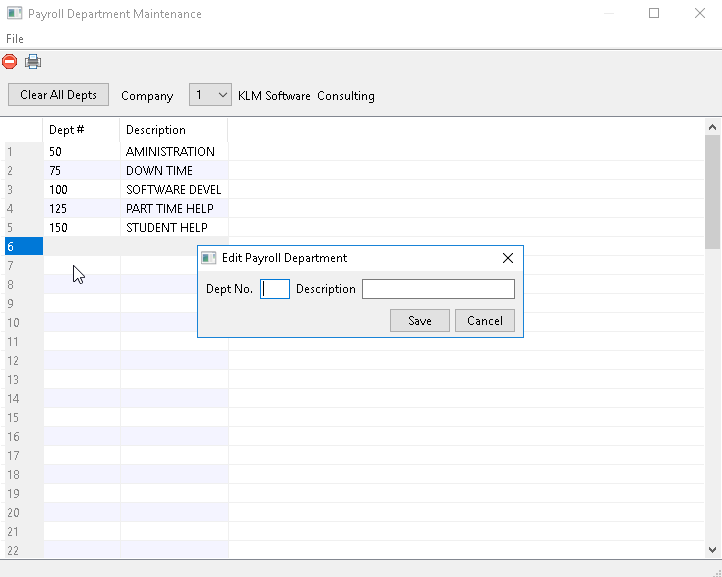
3) To ADD a new Department, place the mouse pointer on the first blank line (start at LINE 1 if no records exist). Double click on the line. A new EDIT Window will appear. Put the Department Number and corresponding Description in the fields provided.
OR
3) To EDIT an existing Department, find the Department you wish to edit. Place the mouse pointer over the department number. Double click on it and a new EDIT Window will appear. You can change both the Department Number and Name but keep in mind that if you change the NUMBER, this will NOT change the number in any of the other data files.
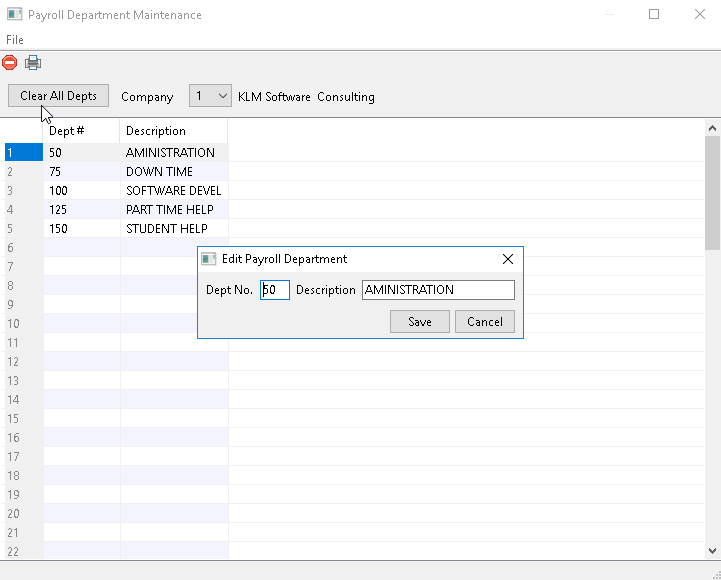
4) When done, click on the SAVE Button. You should see the change in the appropriate listing.
PRINTING DEPARTMENTS
You can print the Department File for any company by use of the Task Bar Menu's Print option or the Print Icon.
Select the appropriate Company's Departments File to be printed, Click on the PRINT Icon or use the Pull Down Menu to select the print option. A standard Windows Print Set Up Box will appear. Select the printer and Click on the OK Button.
WEEK ENDING DATES
As part of the reporting functions of this package, the program applies calendar dates (in year-month-day format) to corresponding week numbers. (i.e. week 4 might be 17-01-25). This makes it easier for you to read reports. You don't have to remember for what date week four's payroll was run. Keep in mind that these dates are separate from the Week Numbers and all reporting is done (limits set) by week number.
Along with appearing in ALL report headings, the week date will be placed in each Employee's Earnings records (see Menu #9) for future reference.
Each calendar year will have it's own Week Ending Dates file (this file is among those automatically re-named as part of the system's year end routine). As well you can assign each Company to it's own specific Week Ending Dates file. This is helpful if you run multiple companies and pay on different time schedules.
The Week Ending Date that will be displayed will be the LAST day for which pay will be applied (hours counted) in a give pay period. For example, if you pay weekly and your last day of that week is Wednesday, January 4th 2017, the corresponding Week Ending Date would be 17 - 01 - 04. That is what would appear against the week number.
The date that appears on the actual pay cheques is separate from this date as most companies calculate pay for prior weeks wages.
If you are bi weekly, you still will list the 1st week (of the 2 week period) for which you will pay employees, not the second. Most companies will have either a 26 (bi-weekly) or 52 (weekly) pay cycle. It is possible to have a 53rd week of wages for a weekly pay.
You must have a valid week ending dates file for each calendar year. You can have more than one file if you choose to set up separate Week Ending Dates for each active company you have.
In addition to the DATE field, there are two other fields that can be used to trigger specific functions, such as paying holiday pay automatically or issuing a once a month deduction in payroll.
- STAT.(Statutory Holiday Pay) - Entering an number in her will automatically pay each employee for that number of days (i.e. 2 will pay for 2 days of work)
- PAY CODE (trigger) - If a pay code (or codes) is entered in this field, the program will automatically process that code's function for this Week Ending Date only. For example, if you only wanted certain deductions such as a group insurance to be deducted once a month from an employee's pay.
These two fields must be set up in conjunction with the appropriate PAY CODE.
To access the KLM Week Ending Dates feature, do the following:
1) From the Payroll MAIN Menu, click on the TOOLS Menu, then select the Week Ending Dates
2) The Week Ending Dates Screen will appear. If this is the first time you have accessed the program, the screen will be blank. If a Weekending Dates file exists, it will be displayed. The program will always default to the Week Ending Dates file for Company 01. You can change this.

3) To ADD a new Week Ending Dates file, first verify the year (the default will always be DAT for the current year). Be sure to select the correct Company as each Company can have it's own file. The CODE indicator displayed at the far right of the screen comes from the Company Master and allows this feature.
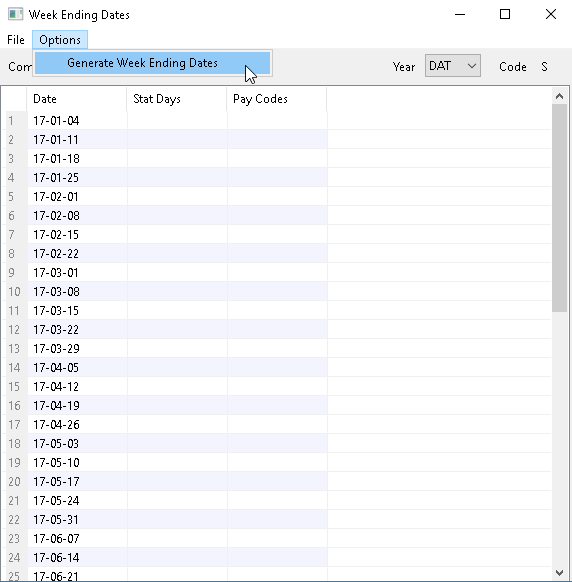
From the Task Bar click on the OPTIONS Tab. Then click on the GENERATE NEW WEEK ENDING DATES option. A dialog box will appear asking for the week ending date of the 1st week for the year. be sure to put the 1st week ending date (regardless of whether you pay weekly) as week ending dates are recorded weekly. Enter the date in Year-Month-Day format (i.e. January 4th 2017 would be entered as 170104.

Click OK so that the program can automatically generate the year's Week Ending Dates file based upon the first date you have entered. You should need to run this utility only once as the program will automatically create a new set of weekending dates at the beginning of each calendar year (as part of the year end routine).
OR
3) To EDIT an existing Week Ending Dates file, find the Date you wish to edit. Place the mouse pointer over the Date. Double click on it and a new EDIT Window will appear. You can change the Date, Stat Days and Pay Codes.
4) When done, click on the SAVE Button. You should see the change in the appropriate listing.
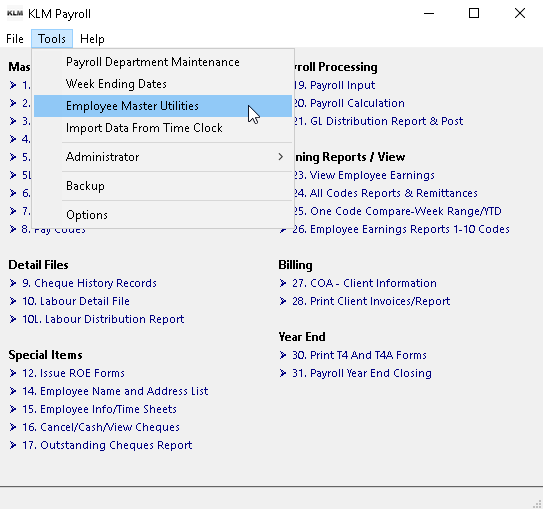
EMPLOYEE MASTER UTILITIES
The KLM Payroll system provides a number of utilities to fix minor data problems that may occur if processes are interrupted or data files are corrupted. Most of these options should NOT be run with out first consulting KLM as to why and how to do so.
A list of the utilities and what each does follows:
- Fix Earnings Record Link For Year
- When run will make sure that the internal linking system is correct. The program always defaults to the DAT (currant) year.
- You might run this option, if reports run in Employee Number order were missing data. - Clear Labour Type Number Field
- When run will clear (reset to zero) the Labour Number Type field in each Employee's Master File record.
- You might use this utility if you wanted a quick way to clear that particular data field. - Update Earnings: Dept # Field For Year
- Resets the Department field in each Employee's earnings record with the DEPT # that is in each Employee's Master file.
- You might want to do this if you needed to reassign all departments or if you were adding the department feature part way through the year. - Reset TD1 Total Tax Credits
- Resets the FED TD1 Amounts in each Employee's Master record. You must know the original TD1 Amount and the dollar amount you want to increase it by.
- You might do this if you had a large number of employees who had a higher TD1 amount than the default. - Reset Real Estate Commission Table
- Is presently not in use and should be ignored. - Accrual Transfer From Prior Year Via Formula
- Evaluates information from any specified pay code in a prior year's earnings data file and creates a carry-over value to be transferred into the current year's payroll.
- You must know the year number you wish to evaluate, the pay code being evaluated and the company for which this is being done.
- The results are stored in the Recurring codes file till the next pay run is done, at which point they will be added to the current year's data files.
- You might use this option, if you wanted a value (say sick days accumulator) to be carried over but did not properly set up the the pay code to do this automatically (see Pay Codes for details).
- You can also use this option to carry-over items such as vacation pay (again if the codes were not properly set up to begin with). - Clear Garbage And Nul Characters From Record Fields
- This utility will clear garbage from the each Employee's Master Record.
- You might want to use this utility if you are getting odd data showing in data fields or on Employee Master Reports. - Fix Employee Alpha Sort File
- This utility re-evaluates then resets the sort functions used in the various reports (any report listed in Employee Name order).
- You might want to use this option if reports in NAME order are in-correctly listed or missing employees.
To access the KLM Week Ending Dates feature, do the following:
1) From the Payroll MAIN Menu, click on the TOOLS Menu, then select the Employee Master Utilities
2) When you first enter this menu option, you are presented with a list of utilities. Each utility is a separate option and will run a specific routine. At the far right of each option is the RUN Button. Click once on this button only after you have answered any corresponding prompts with in that utility.
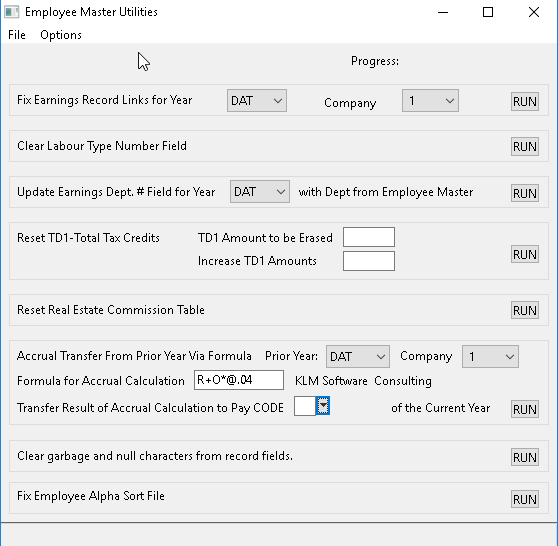
3) A series of messages will appear. These messages vary depending upon which utility was selected. Once all maintenance is done, the message Maintenance Complete OK will appear. Click on OK to Finish said option.
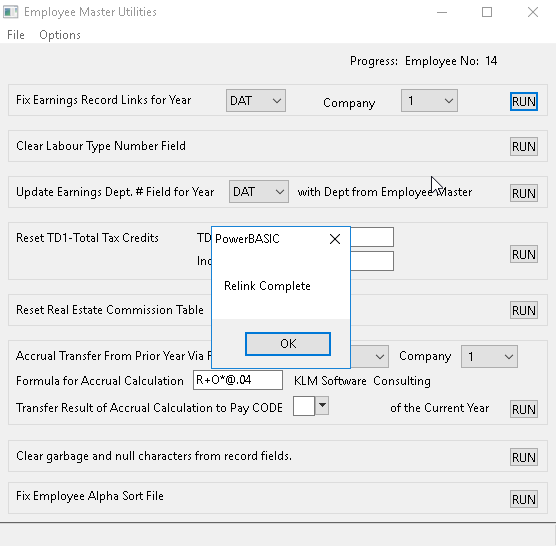
4) Once you have RUN any utility, exit this option and verify that the function worked correctly. If not, contact KLM Software immediately.