USER-Administration.html
USER Administration Tools
User IDs
Each user that is going to use KLM will need a USER ID and password. Users can be limited to one or more KLM modules. There are no password restrictions but each user will need a password. There are also four Access Level's explained below.
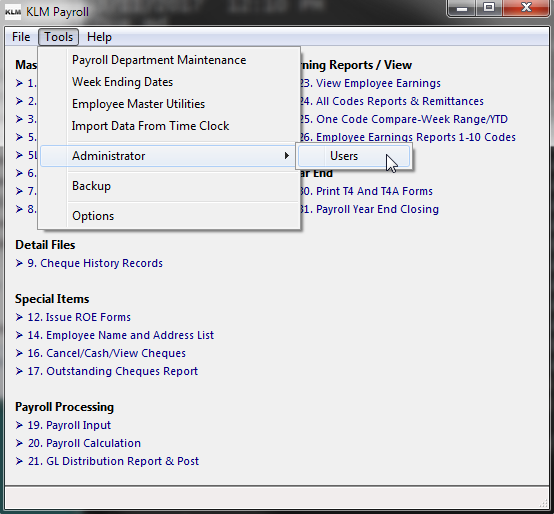
User Administration is accessed from the Main Menu of any KLM module from Tools -> Administrator -> Users
Note: only users with Administrator level access can access the User menu.
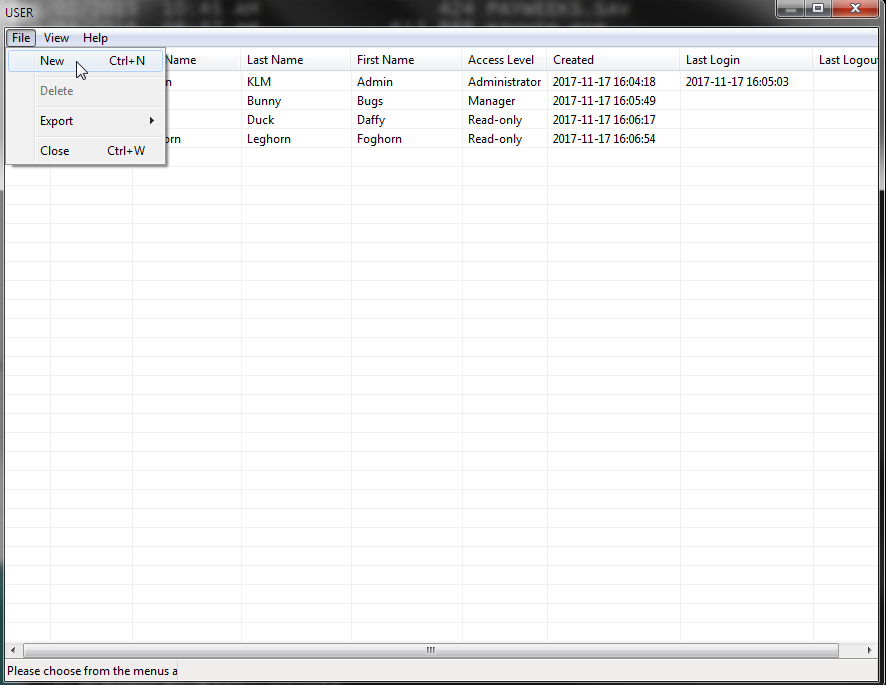
When User Administration is started the Users List View is displayed. From this List View current users can be edited, enabled/disabled and new users can be added.

Add a NEW User ID
Press Alt+F then New or Ctrl+N
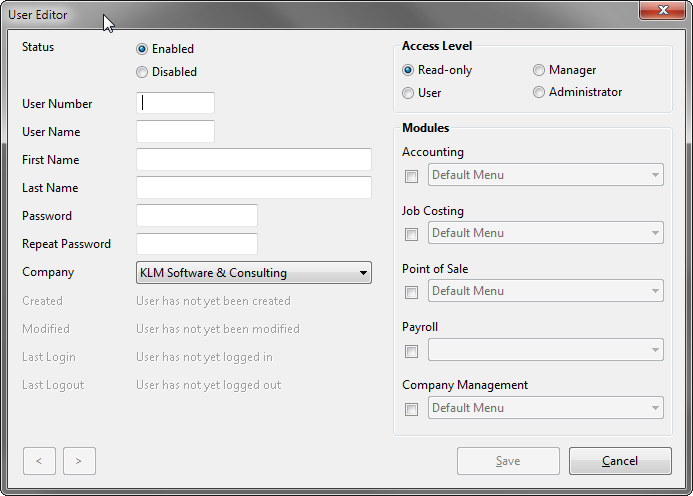
Field Summary:
STATUS: Enabled (active) or Disabled (inactive)
USER NUMBER: Enter the next number in order.
USER NAME: Is what they employee will enter in the USER NAME prompt, upon entering system.
FIRST /LAST NAME: OF employee.
PASSWORD: Employees Password for all modules. This field appears twice, enter same password a second time to confirm it.
COMPANY: If selected, limits this employee to entering only the company selected. This field must match the company selected (upon entry of system) or the employee will be denied access.
ACCESS LEVEL: Determines the amount of access the employee has. There are 4 levels.
Level or access
- Read Only - view contents but make NO changes to data or run any reports
- User - enter data records, view master files but make no changes. Can not run financial or payroll reports.*
- Manager - enter data records, alter master files, run reports (including financial).
- Administrator - complete access to all systems. Only administrators can change the USER ID file or create custom MENUS. Only administrators can alter records in the GL Detail Journal.
MODULES: Select which systems the employee has access to. As well, within each system, you can select a custom menu for said employee. This will be the menu they see upon entry of each system. Leaving the default in place will display the Main Menu of each system.
NOTE - If you plan on using the custom menus option, you should create menus first, to save time
Alter an EXISTING User ID
To Alter an EXISTING user do the following:
- From the MAIN Menu, go to TOOLS, then select ADMINISTRATION. You have 2 choices: MENUS or USERS.
- Select USERS. A new screen will appear, listing all current USER IDs. Highlight the USER you wish to alter, then double click to display the EDIT screen for said user record.
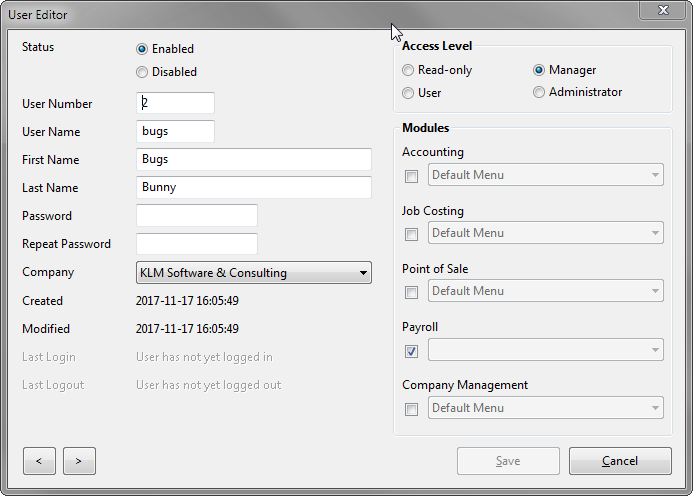
- Make any changes to the record, then click on the SAVE button. The EDIT screen disappears and you are returned to the current USER listing. Any changes made should be displayed.
DELETING an USER:
If you disable a user record, it will disappear from the current USER ID listing but the physical record is still in the file.
To VIEW, inactive (deleted) USER IDs, do the following
- From the MAIN Menu, go to TOOLS, then select ADMINISTRATION. You have 2 choices: MENUS or USERS.
- Select USERS. A new screen will appear, listing all current USER IDs.
- Select FILE, then click on INACTIVE RECORDS to display any disabled records in the file. The records in question will be displayed immediately. Follow the steps to ALTER an existing record, if you want to reactivate a USER.