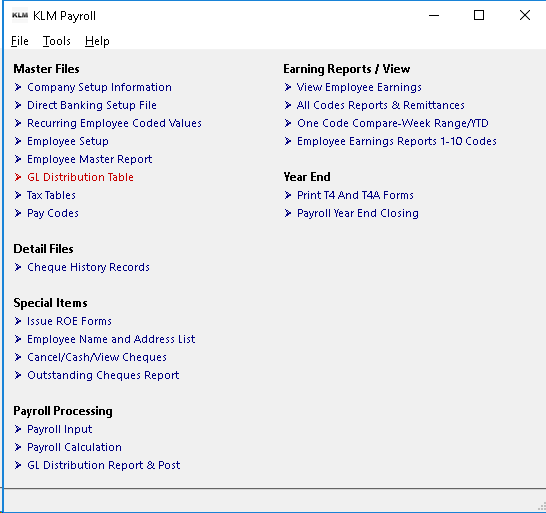
GL Distribution Table Setupl
GL DISTRIBUTION TABLE
PURPOSE:
The records in this file are used to edit post functions of GL Distribution Report (see Menu #21).
A basic sample file is provided, but you must verify its content before you run the GL Distribution Report & Post for the first time, and again if you add or change pay codes or payroll related GL Accounts.
If you have the KLM Accounting, each record in this file will create a GL detail journal record (if the result is not zero) when the GL Distribution Report is run.
If you don't have KLM Accounting, ignore all references to the GL detail journal record creation. The GL Distribution Report that results from this file can be used to simplify input of payroll totals into any Accounting System.
Upon entry of this option, you will see a display of all data records in this file. The program allows for multiple files, one for each payroll company that exists. If you have choose to have multiple files, be sure to select the correct COMPANY before making any changes in this option. The program always defaults to Company One.
Below is the sample list of GL DIstribution Table records, as provided by KLM Software.

HOW TO BUILD, VERIFY OR MAKE CHANGES TO THIS FILE
REQUIREMENTS:
- A working knowledge of double entry Accounting principles is required if you wish to make any major changes to this file. Ask your accountant or a KLM consultant for help. When you run the GL Distribution Report, the result from all these records must add to zero or you will put your GL Journal out of balance.
- Run a list of all PAY CODES (ie. R,O,H,V,A, ...) used in your payroll. Use the All Codes Reports & Remittances report to do this.
- Run a list of GL Accounts you will be narrowing in on the expense and liability accounts that are affected by payroll. If you have KLM Accounting you can run this listing from the GL Account Master menu.
STEPS TO FOLLOW:
1) Select one of your most complicated pay cheques. If you don't have a pay cheque that has all possible values used, make up one. This will be the test sample, to make sure that all values will be posted and the result shows a zero balanced.
2) Lay out on paper (using the following chart headings) an account breakdown of all amounts in your sample pay cheque. Start with what bank account to post the cheque total (Net Pay Code=N).
DESCRIPTION |
PAY CODE |
DEPT |
GL Account |
+/- |
AMT. |
Cheques Total |
N |
100 |
011 |
- |
1500.00 |
If you want cheques to be transferred individually to your GL journal, then place a "CHQ" in the TRANSACTION TYPE field of the record assigned with the N (for pay code). Otherwise just one journal record with a total of all cheques will be posted to your Bank Account.
3) Continue with the rest of the cheque totals assigning each pay code value to an appropriate account. You can group pay codes on the same line if all other items in the chart are the same.
DESCRIPTION |
PAY CODE |
DEPT |
GL Account |
+/- |
AMT. |
Regular Wages |
R |
100 |
770 |
+ |
1700.00 |
Income Taxes |
T |
100 |
310 |
- |
200.00 |
EARNINGS must be specified with a "+" in the "+/-" column. Also, do not specify "G", but instead break it down into its parts (i.e. R=Regular Pay V=Vacation Pay .....).
DEDUCTIONS must be specified with a "-" in the "+/-" column.
OTHER values that have no direct effect on the net total (i.e. as taxable benefits, vacation pay accrual, workers compensation,and employers portion of the UIC and CPP remittance) must have two entries, one "+", one "-", if you choose to post them.
4) If you haven't assigned amounts to this chart, do so now using our sample cheque. Then using the "+/-" indicator in the chart, add and subtract the amounts. If the result is not zero, rework the chart until it is. Even if the balance is zero if you don't have a good accounting background have someone look it over who does.
5) Access MENU #6 (GL Distribution Table)to input this chart. When you first enter this option, the sample CHART KLM has provided you will be displayed. If it is easier to modify the existing chart, you can update, delete, add or move any record in the file, otherwise delete all records and add new records (one for each line on your chart).
6) To test the chart, do a TEST RUN from MENU #21 GL Distribution Report against a past payroll week.If any balance errors are encountered, you will get an error report to help track down any problems or missing items in your chart. Also you will get a sample of the custom GL Distribution report your chart created.
ADDING NEW RECORDS
From the List / View (first)screen, of this option, go to the MENU Bar then select FILE. From the Pull Down Menu select NEW. If you have multiple Payroll Companies, be sure to select the correct Company before adding any new records.
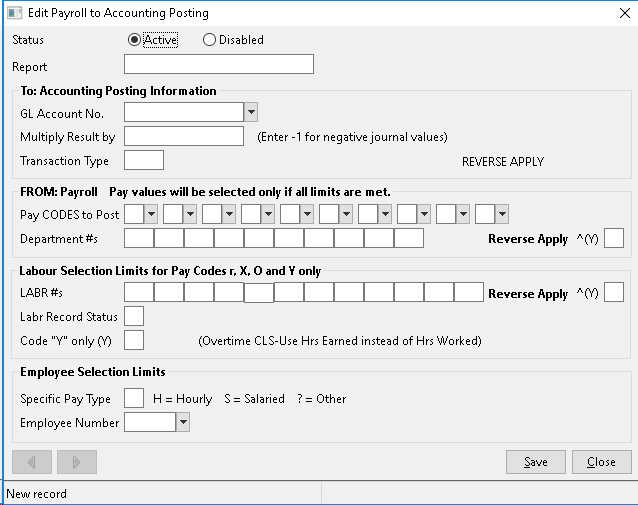
A blank input edit screen will appear. Fill in the appropriate fields (see field explanations) then save the newly created record.
OR
Select CANCEL instead to return to the List/View screen without saving any changes or record additions you were in the process of entering.
UPDATING EXISTING RECORDS
From the List/View (first) screen, select any existing record simply by placing the cursor (mouse pointer) on it and DOUBLE clicking The selected record will appear.
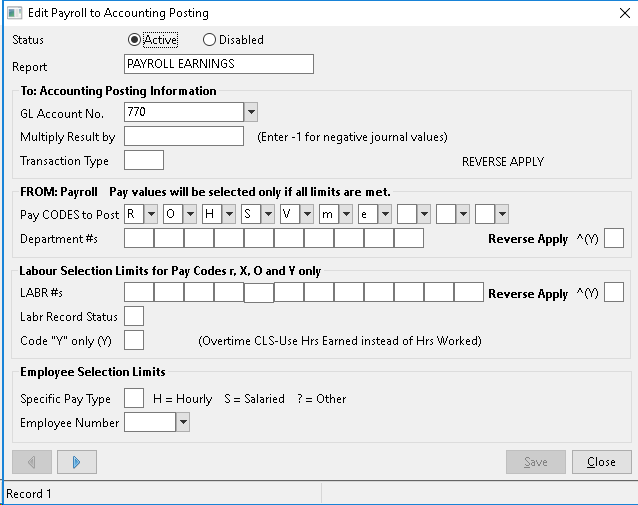
Once all changes have been made, click on the SAVE button to record changes. You will be returned to the List / view screen.
DELETE AN EXISTING RECORD
Locate the record you wish to delete in the List/View screen and position the cursor on that line then DOUBLE click to make the detail record appear.
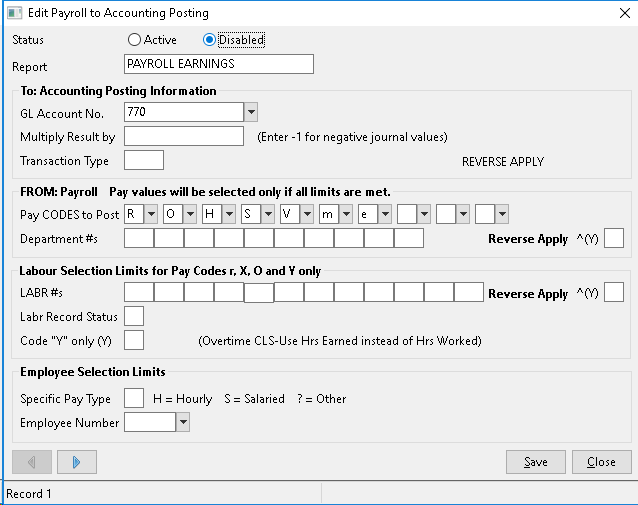
Change the STATUS indicator from ACTIVE (A status) to DISABLED (D status). Then click on the SAVE button. The prior listing will reappear. The record will no longer appear.
NOTE Records deleted are not removed from the file only flagged as inactive and are not accessed during posting in MENU#21. If you wish to reactivate (or view) deleted (disabled) records, from the MENU Bar, select VIEW than click once on DISABLED RECORDS. All records, including those with a Status of D will appear.
PRINT A LIST OF EXISTING RECORDS
From the List/View screen for this option, go to the MENU* Bar and select FILE. From the Pull Down List, select PRINT. A Windows print setup screen will appear. Select your printer then Click on the OK Button to continue.
FIELD EXPLANATIONS
FIELD |
DESCRIPTION |
|
STATUS |
A functionally ACTIVE record (has a status of A)A deleted or DISABLED record (has a status of D). All D Statues records will be ignored when running Pay MENU #21. |
|
REPORT |
Enter an account name or description. This information will appear on the Payroll Posting Summary Report. |
|
GL ACCOUNT NO |
Enter a VALID GL Account Number. All information entered on this record will be placed against the the GL Account Number specified. If you are unsure of the account number you may use the PULL DOWN Menu to verify the number. |
|
MULTIPLY RESULT BY |
Optional. You may enter one or more figures which will be multiplied by the total amount before it is posted to the GL Account. |
|
TRANSACTION TYPE |
If journal records are created, this field will be assigned to the TRANSACTION TYPE fields of GL Detail journal records resulting from this posting. If you are transferring payroll cheques to your accounting system and you do not want to use the main bank account setup for your company, use CHQ in this field along with (N for NET PAY} and the alternate bank account. |
|
PAY CODES TO POST |
Enter up to 10 VALID Pay Codes. Only the amounts from those codes will be applied to the Account Number. A minimum of ONE pay code is required or an error will occur when Menu #21 is run. If unsure of a PAY CODE, use the PULL DOWN Menu to select a VALID Pay Code. |
|
DEPARTMENT NO. |
Optional: You can place one or more department numbers in the 10 fields that follow. Any entries made, limit the processing of earnings records to those with appropriate department number assigned to them. |
|
REVERSE APPLY (Y) |
Optional: If a Y for yes is placed in this field, the department number(s) field limit works in reverse. The program will retrieve only those records that do not contain the **above **department(s). |
|
LABR NOs |
Optional: You can place one or more labour numbers in the 10 fields that follow. Any entries made limit the processing of earnings records to the appropriate labour number. Labour numbers are NOT used in the Basic Payroll. |
|
REVERSE APPLY (Y) |
Optional: If a Y for yes is placed in this field, the labour number(s) field limit works in reverse. it will retrieve ONLY those records that do NOT contain the above labour numbers. This field is NOT used in the Basic payroll. |
|
LABOUR RECORD STATUS |
Optional: If any one of the following; A I C B or Q is placed in this one character field, it will limit the processing of earnings records to those that match the above characters. This field is NOT used in the Basic Payroll system. |
|
CODE Y ONLY (Y) |
Optional: When applying the dollar amounts for Overtime Earnings (Pay Code O) you can override payroll calculation of Overtime Wage. When Y or YES is placed in this field, the value of PAY CODE O is based on the hours worked times the pay rate. This field is NOT used in the Basic Payroll System. |
|
SPECIFIC PAY TYPE |
Optional. Limit pay codes being posted to certain Types of Employees. Enter H to limit codes to hourly employees. Enter S to limit codes to salary employees. |
|
EMPLOYEE NUMBER |
Optional: You can place a valid employee number in this field. Entries made, will limit the processing of earnings records to those with the appropriate employee number. All other records are ignored. |