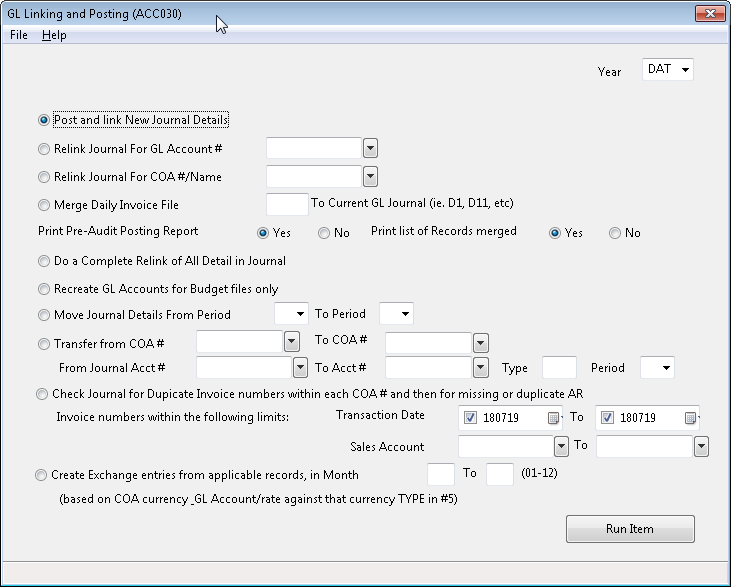
GL Linking and Posting
POST NEW GLACCOUNT RECORDS
(Evaluate/Maintain Detail Journal)
PURPOSE:
This program functions are to update the GL Account summaries (The GL Master) and add in all newly created detail journal records to the existing record links set up for both the GL ACCOUNT and COA (Customer/Supplier) NUMBERS.
When this program "links" GL Account and/or COA Numbers, it is actually sorting the records in a specific order. The linking of records speeds up access to this information. When this program "posts" journal records it is actually evaluating the debits and credits (plus and minus figures) for each GL Account. The results of this evaluation are placed against the appropriate GL Account Number in the GL Accounts Master File. The GL Master File is used when Financial Statements are generated. It contains the totals for each GL Account for each Period of the year.
Run one or more of the utilities in this menu, if you have performed any of the following tasks:
* Added, updated or deleted either newly created or existing journal records
* Corrected earlier errors (produced by this or other menu options).
* Created external journal files (using another KLM Software package) that must be merged with the main detail journal file.
* Created figures in Menu #10 for "budget reporting".
* Assigned the wrong accounting period to journal records already created/updated. Until a link and post is run, any reports that you run will be out-of-date.
REQUIREMENTS:
The following files must be in place, or errors will occur, when this option is run:
* A valid Company Master - Incl. Auto. GL Account Setup
* A valid GL Chart of Accounts
* Valid COA Master file
Be sure to specify the correct data year. The program defaults to the current year (ie. DAT) if no entry is made.
If data errors are detected, an error report will be printed. Any errors must be corrected as soon as possible. Any data (journal) record with errors will not be properly linked, nor will the GL Account summary figures in the GL Master be updated. Any error report printed will list each defective record, along with an explanation of what is wrong with the record. The report begins by telling why it is being printed and what must be done to correct the problems.
Before fixing any error, be sure you know what is wrong. The most common errors usually involve the posting of an invalid GL Account or COA number.
When fixing errors, one of two methods is used:
1) Fix the error, then return to this program and run Option #5 Complete Re-link & Post. This is the best course of action, if a large number of records have invalid information. OR
2) Delete the journal entry and re-create it properly. Return to this program and run Option #1 Link & Post. This is the best course of action if only one or two entries were effected. Each of the options for this menu perform a specific task or tasks. Do not run any option without fully understanding it's functions.
POST AND LINK NEW GL JOURNAL ENTRIES
This is the most frequently run option of this menu. Run this option if any of the following functions have been done:
* New journal records have been created.
* Existing journal records have been deleted.
* Existing journal records have been altered by changing either the PERIOD NUMBER or DOLLAR AMOUNT fields.
This option has two separate functions that are as follow:
1) The Account and COA Numbers of each NEW journal record are added to the existing linking (sort) files.
2) After all NEW journal records have been added to the appropriate files, the program re-evaluates all existing journal records and updates each of the GL Account Master records with the latest information.
Follow the steps below to run a standard link and post of your detail journal records:
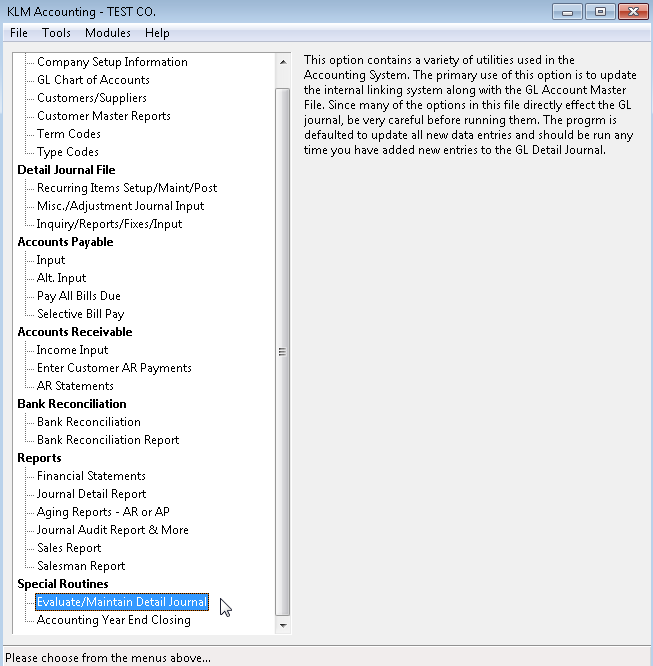
1) From the KLM Accounting System Menu click on "Evaluate/Maintain Detail Journal"
2) At the GL LInk And Post Screen verify both the COMPANY NUMBER and DATA YEAR. These fields must be accurate, as the contents determine which detail journal file is accessed and updated. .
3) Click on "Run Item".
4) Once the procedure has begun, don't interrupt the processing. A series of messages will appear at the bottom of your screen as the program goes through each function. Be sure to check your printer, to ensure that no errors were generated when this option was run. Any errors must be dealt with as soon as possible.
RELINK JOURNAL FOR GL ACCOUNT NUMBER
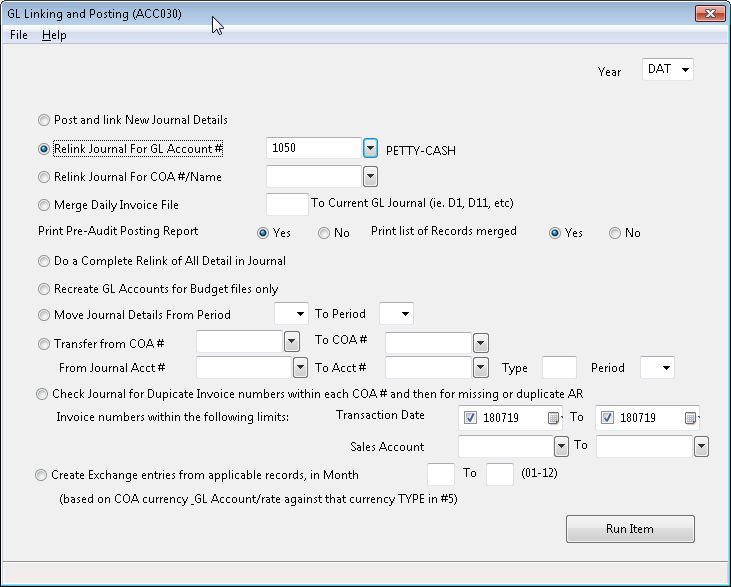
Run this option to fix the journal record links for a specified GL ACCOUNT Number. This option provides a means of fixing one or more GL Accounts without having to run a complete re-link of ALL journal records. Run this option only if you know the linking errors are confined to a particular GL Account or Accounts or if you have changed one or more GL Account Numbers after they were posted using either Link New Journal Details or Relink for one GL #.
Follow the steps below to run a ink and post for one or more specific GL Account Numbers:
1) At the GL LInk And Post Screen verify both the COMPANY NUMBER and DATA YEAR. These fields must be accurate, as the contents determine which detail journal file is accessed and updated. Use the SCAN feature if unsure of the Company Number.
3) Click the Radio Button for "Relink Journal for GL Account #"
4) Type in the GL Account Number or use the Selector
5) Once the procedure has begun, don't interrupt the processing. A messages will appear at the top of your screen indicating which GL Account is being re-linked. When the process is complete, you will be prompted to enter another GL ACCOUNT NUMBER. Re-link more GL Accounts or exit the program.
Note: If you still have problems retrieving or listing journal records for the above ACCOUNT #'s, run a Complete Re-Link of both COA's an GL Account Numbers.
RELINK JOURNAL FOR COA#/NAME
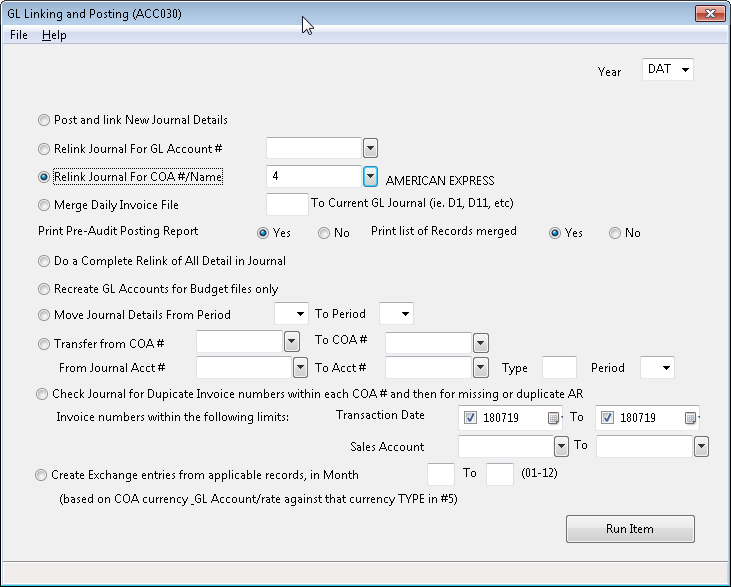
Run this option to fix the journal record LINKS for a specified COA Number. This option provides a means of fixing one or more COA's without having to run a complete re-link of all journal records. Run this option ONLY if you know the linking errors are confined to a particular COA or COA's or if you have changed one or more COA Numbers after they were posted using either the first or 2nd options. Follow the steps below to run a Link and Post for one or more specific COA Numbers:
1) At the GL LInk And Post Screen verify both the COMPANY NUMBER and DATA YEAR. These fields MUST be accurate, as the contents determine which detail journal file is accessed and updated. .
2) Once the procedure has begun, don't interrupt the processing. A message will appear at the top of your screen indicating which COA is being re-linked.
MERGE JOURNAL RECORDS FROM A DAILY JOURNAL FILE INTO THE MAIN JOURNAL
To use this option have the following files and software in place.
* An active version of one of the following KLM software packages: Job Costing or Inventory Control.
* The appropriate setup in either of the above systems that will create the necessary side file for temporary storage of journal records generated when either AR Invoices or AP Bills were processed.
Note: The default for both the Job Costing & Inventory systems automatically creates a daily Journal instead of transferring data directly into the main journal.
* An actual temp Journal file to transfer. Once merged the temp Journal is automatically deleted.
Note: You can not merge journal files from other Accounting packages. This option is designed specifically for KLM Software's systems. This option will add journal records from a Daily Journal into the main Journal then remove the Daily Journal file to prevent duplicating of journal entries. After adding these records run a LINK & POST
Follow the steps below to merge a Daily Journal File into the main Detail Journal:
1) At the GL LInk And Post Screen verify both the COMPANY NUMBER and DATA YEAR. These fields must be accurate as the contents determine which detail journal file is accessed and updated.
Note: The DATA YEAR file prompt must represent either the current or prior year's detail journal file. Do not try to merge a daily Journal into itself.
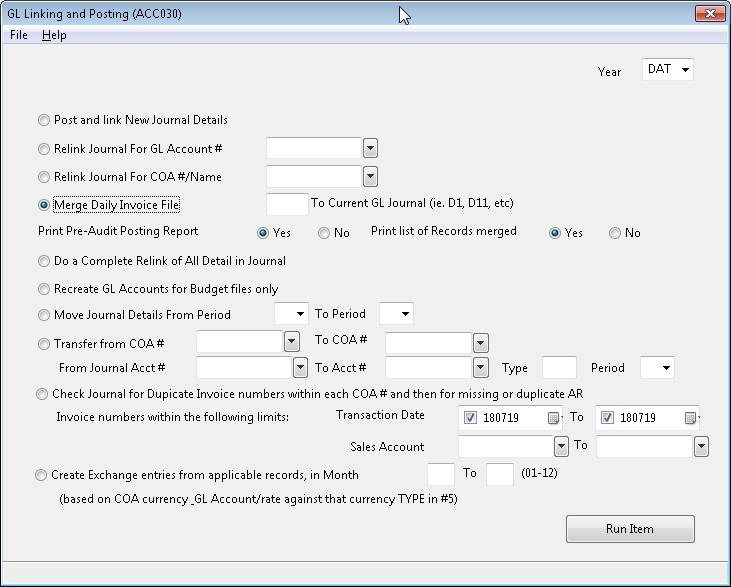
2) Click on the Radio Button for "Merge Daily Invoice File" Enter a valid FIle ID. (D1, D2 etc)
Note: The default file ID for daily Journal files created in the Inventory/Job costing or Accounting systems is "DIN". An alternative method of creating daily Journals files can also be done. Journal files of this nature would be named as "D##" the "##" portion would represent the day of the month the file was created (ie. D07).
3) Optional: For auditing purposes there are two separate reports. The default setting is Y for YES (for both reports).
The "Print Pre-Audit Posting Report" lists the contents of the Daily Journal file before the actual merge routine begins. The "Print List Of Records Merged" lists the Journal records as they are being transferred (merged) into the main file. Rejected records will not be listed.
4) Once the procedure has begun don't interrupt the processing. Messages will appear at the bottom of the screen indicating the procedures being done. When the transfer is complete, a LINK & POST of the newly created journal records is automatically done to ensure that the journal is properly updated.
Do a Complete Relink of All Detail in Journal
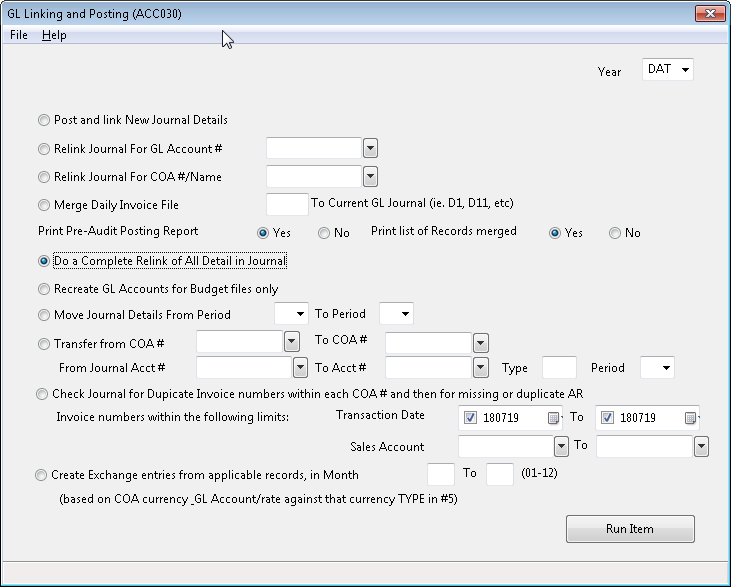
This option can be run anytime errors are detected in either the GL ACCOUNT or COA Numbers. Any of the following situations will require the running of this option:
* Errors in either the GL Account or COA Number of records already processed
* Errors that are still present even after running a full Relink.
* Changing of any GL Account Number or COA Number after processing.
* After creating a corresponding GL Account Master file for budget figures.
Any ERROR that already exists must be corrected BEFORE running this option.
This option has two separate functions that are as follow:
1) The Account and COA Number links are cleared. All journal entries are evaluated as NEW records. The linking system is setup as if this was the first time.
2) After ALL journal records have been added to the appropriate files the program re-evaluates ALL existing journal records and updates each of the GL Account Master record with the lasted information. Follow the steps below to run a complete re-link and post of your detail journal records:
3) At the GL LInk And Post Screen verify both the COMPANY NUMBER and DATA YEAR. These fields must be accurate, as the contents determine which detail journal file is accessed and updated.
4) Once the procedure has begun, don't interrupt the processing. A series of messages will appear at the bottom of your screen as the program goes through each function.
RECREATE GL ACCOUNT MASTER FILE FOR BUDGET FIGURES
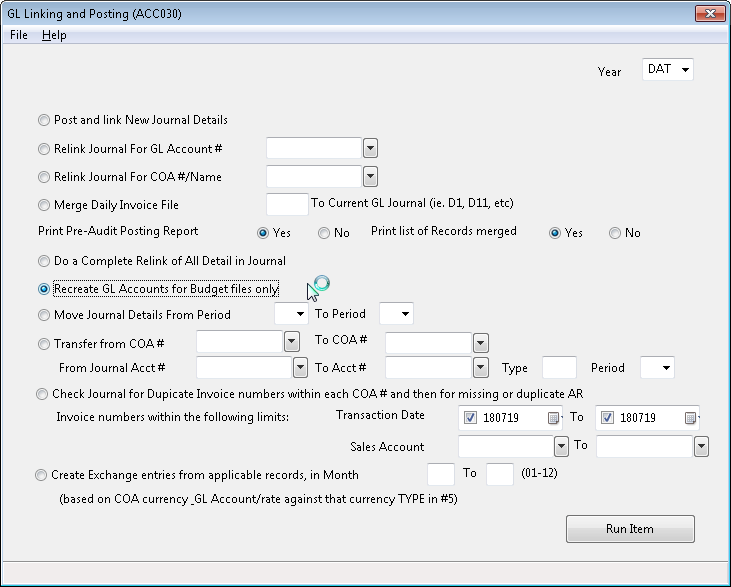
This option was created to provide a short-cut method of generating the necessary GL Account Master File that must exist for each detail journal file (including Daily Journal files created to store budget figures). This option must be run before any budget reporting can be done. In order to use this option, you must have the following files in place.
* An active GL Account Master file for the appropriate company. The program will default to company one if no alternative is given.
* A detail journal file with appropriate budget figures already entered. Be sure to follow the file naming conventions outlined in Menu #10. This option has two separate functions, that are as follows:
* Using the current year's GL Accounts Master file as a guide, the program creates a NEW GL Chart of Accounts for the summary figures of the budget year.
* Once the necessary file has been created, the program automatically runs a complete relink.
See Complete Relink for details. Follow the steps below to create the necessary GL Account file for the corresponding budget figures:
1) At the GL LInk And Post Screen verify both the COMPANY NUMBER and DATA YEAR. These fields must be accurate as the contents determine which detail journal file is accessed and updated.
Note: The DATA YEAR file prompt must represent the BUDGE FILE'S ID, so that the proper file ID can be applied to the newly created GL Account Master file
2) Once you have verified the Company and Year prompts click the Radio Button "Recreate gL Accounts for Budget files only"
3) Once the procedure has begun, don't interrupt the processing. Messages will appear at the bottom of your screen indicating the procedures being done. When the transfer is complete, a COMPLETE Link & Post is done for the
"budget file" so that the newly created GL Account file is properly updated.
MOVE JOURNAL RECORDS FROM ONE PERIOD TO ANOTHER
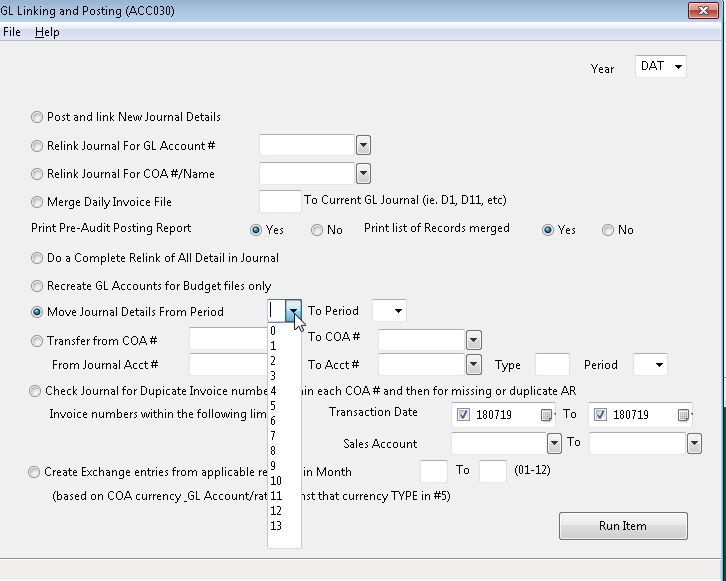
Like option six, this utility is designed to offer a short cut. If you assigned your journal entries to the wrong period this option will automatically reassign them to the correct accounting period. You must provide both the original period and the new (correct) accounting period. Keep in mind the fact that this utility is universal; ALL journal records for said accounting period will period will be moved (renumbered) to the NEW accounting period. Run a Link & Post once this option is complete so that your GL Chart of Accounts summaries will be accurate. Follow the steps below to move journal records from one period to another period:
1) At the GL LInk And Post Screen verify both the COMPANY NUMBER and DATA YEAR. These fields must be accurate, as the contents determine which detail journal file is accessed and updated.
2) Click on the Radio Button "Move Journal Details From Period"
3) Once the procedure has begun, don't interrupt the processing. Messages will appear at the bottom of your screen indicating the procedures being done. When the transfer is complete, a LINK & POST of the ALL journal records is
automatically done to ensure that the journal is properly updated.